The demand for integrating AI tools with Obsidian has been growing rapidly. Today, I'll show you how to use MCP (Model Context Protocol) server to directly control Obsidian notes from Gemini CLI and Kiro.
After testing this setup myself, I found it incredibly convenient to search and create Obsidian notes using natural language. I'll cover everything including how to access Windows Obsidian from WSL environment.
What is MCP Server?
MCP (Model Context Protocol) server acts as a bridge between AI tools and external applications. Simply put, it enables AI tools like Gemini CLI and Kiro to control Obsidian using natural language commands.
Think of it as a translator that converts instructions like "search today's notes" or "create a new note" into actual Obsidian operations.
Setting Up Obsidian
Enable Community Plugins
First, let's enable community plugins in Obsidian:
- Open Obsidian settings
- Navigate to "Community plugins"
- Click "Turn on community plugins"
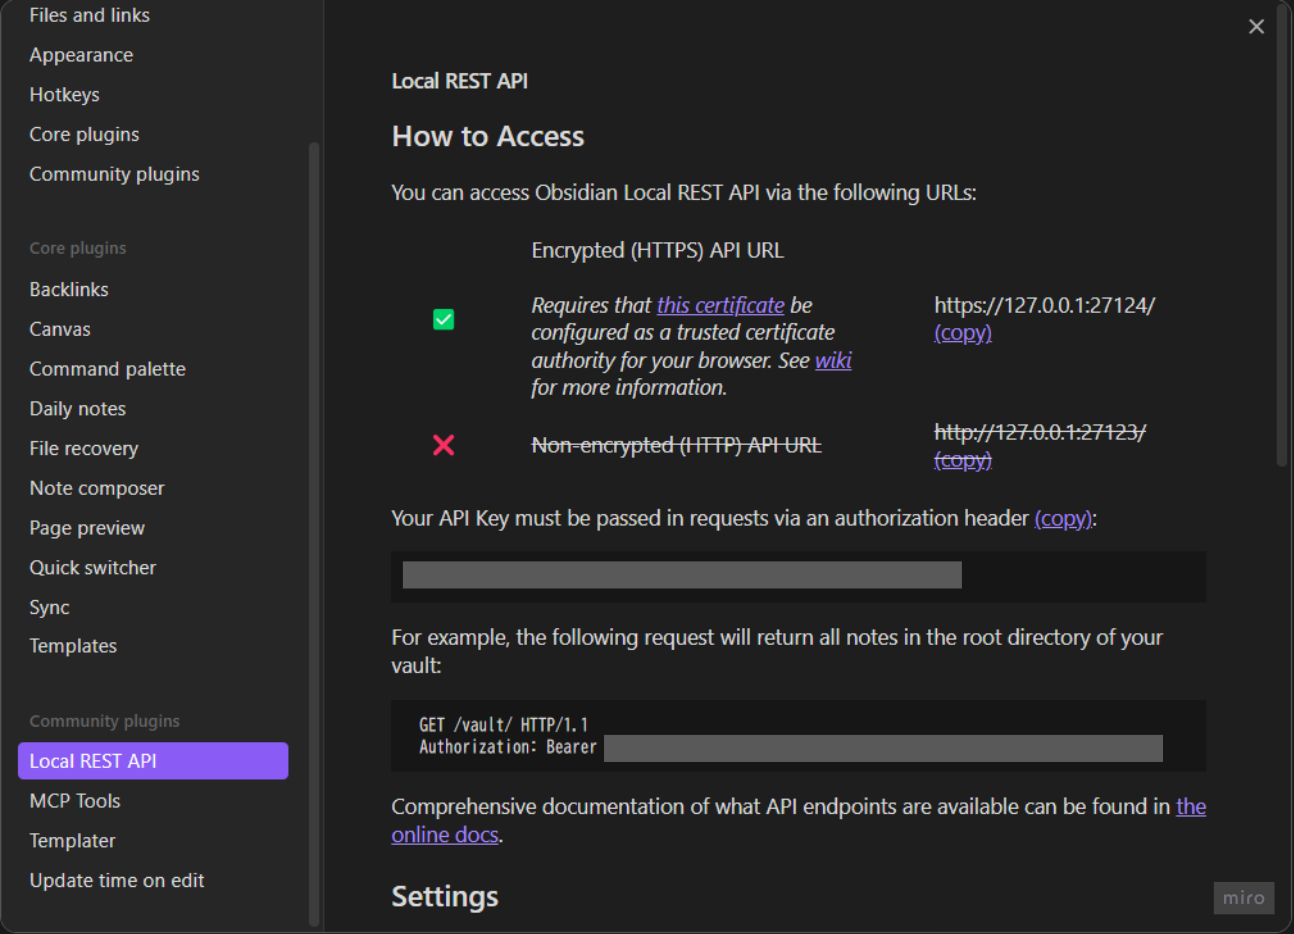
Install Local REST API Plugin
Next, we need to enable external access to Obsidian through an API:
- Search for "Local REST API" in community plugins
- Install and enable the plugin
- Note down the API Key shown in the settings
Make sure to save this API Key as we'll need it for CLI integration later.
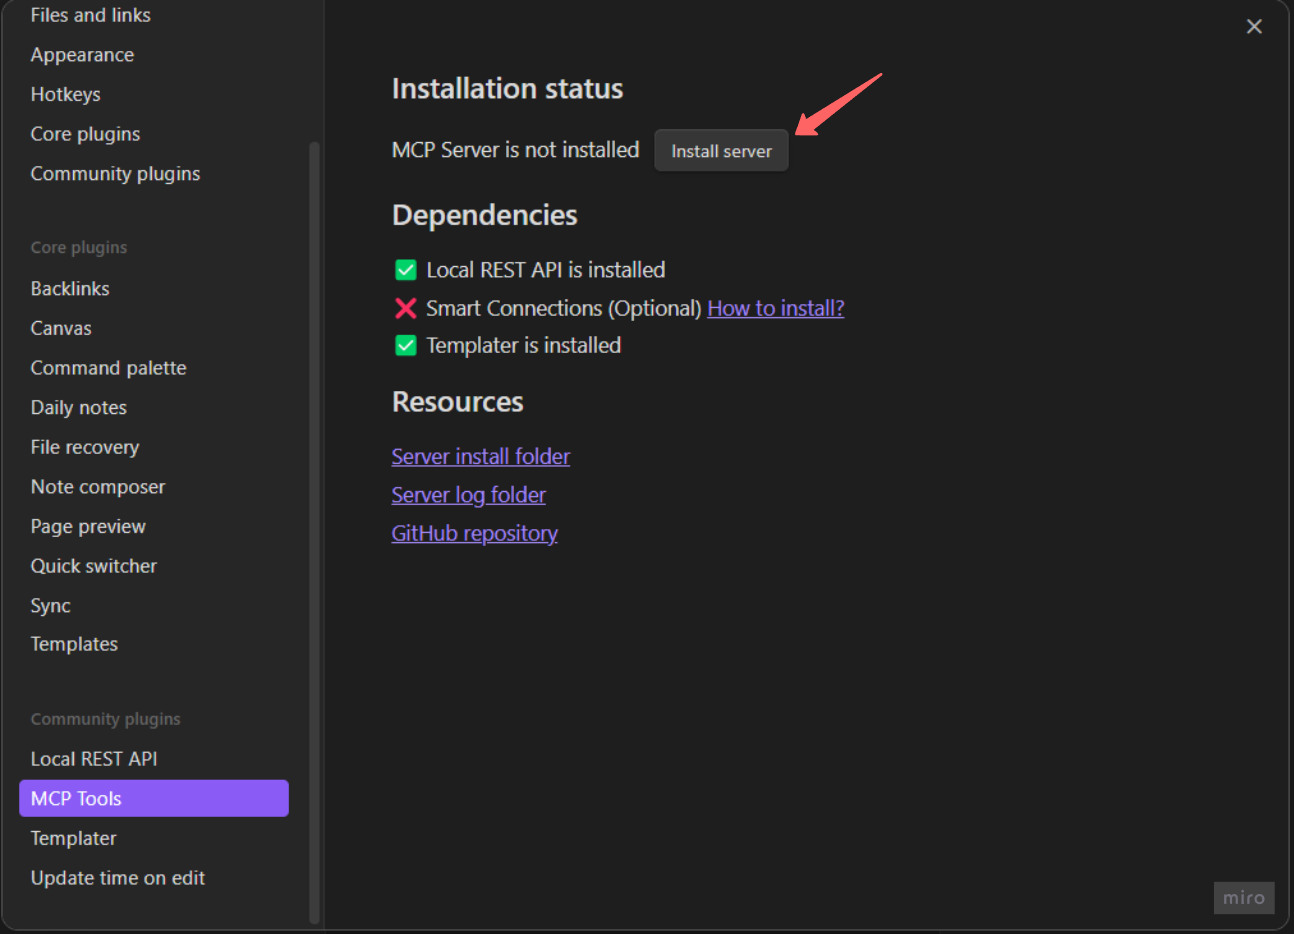
Install MCP Tools Plugin
Now let's install the MCP server itself:
- Search and install "MCP Tools" plugin
- After enabling, click "Install server"
- The MCP server executable
mcp-serverwill be placed in your vault
Path Configuration
Getting the Execution Path
From the plugin settings, open the "Server install folder" and navigate to the bin folder to get the path.
Important: You need to manually append /mcp-server to the folder path.
Example (Windows environment):
C:/Users/username/OneDrive/tools/obsidian/.obsidian/plugins/mcp-tools/bin/mcp-server
Handling Paths with Spaces
If your path contains spaces (like Obsidian Vault), always wrap it in double quotes when using in terminal commands.
Gemini CLI Configuration
Registering the MCP Server
Run the following command in your terminal:
gemini mcp add obsidian-mcp-tools -s user -- "path/to/mcp-server" --env OBSIDIAN_API_KEY="your_api_key"
Real example:
gemini mcp add obsidian-mcp-tools -s user -- "C:/Users/username/OneDrive/tools/obsidian/.obsidian/plugins/mcp-tools/bin/mcp-server" --env OBSIDIAN_API_KEY="your_api_key"
The -s user option makes the server available across all projects.
Direct Configuration File Editing
If you prefer editing configuration files directly, you can add this to ~/.gemini/settings.json:
{
  "mcpServers": {
    "obsidian-mcp-tools": {
      "command": "C:/Users/username/OneDrive/tools/obsidian/.obsidian/plugins/mcp-tools/bin/mcp-server",
      "args": [],
      "env": {
        "OBSIDIAN_API_KEY": "your_api_key"
      }
    }
  }
}
Verify Connection
Once configured, verify the connection:
gemini mcp list
You should see something like:
obsidian-mcp-tools: ... - ✓ Connected
Testing the Setup
Getting Note List
Start Gemini and test Obsidian operations:
gemini
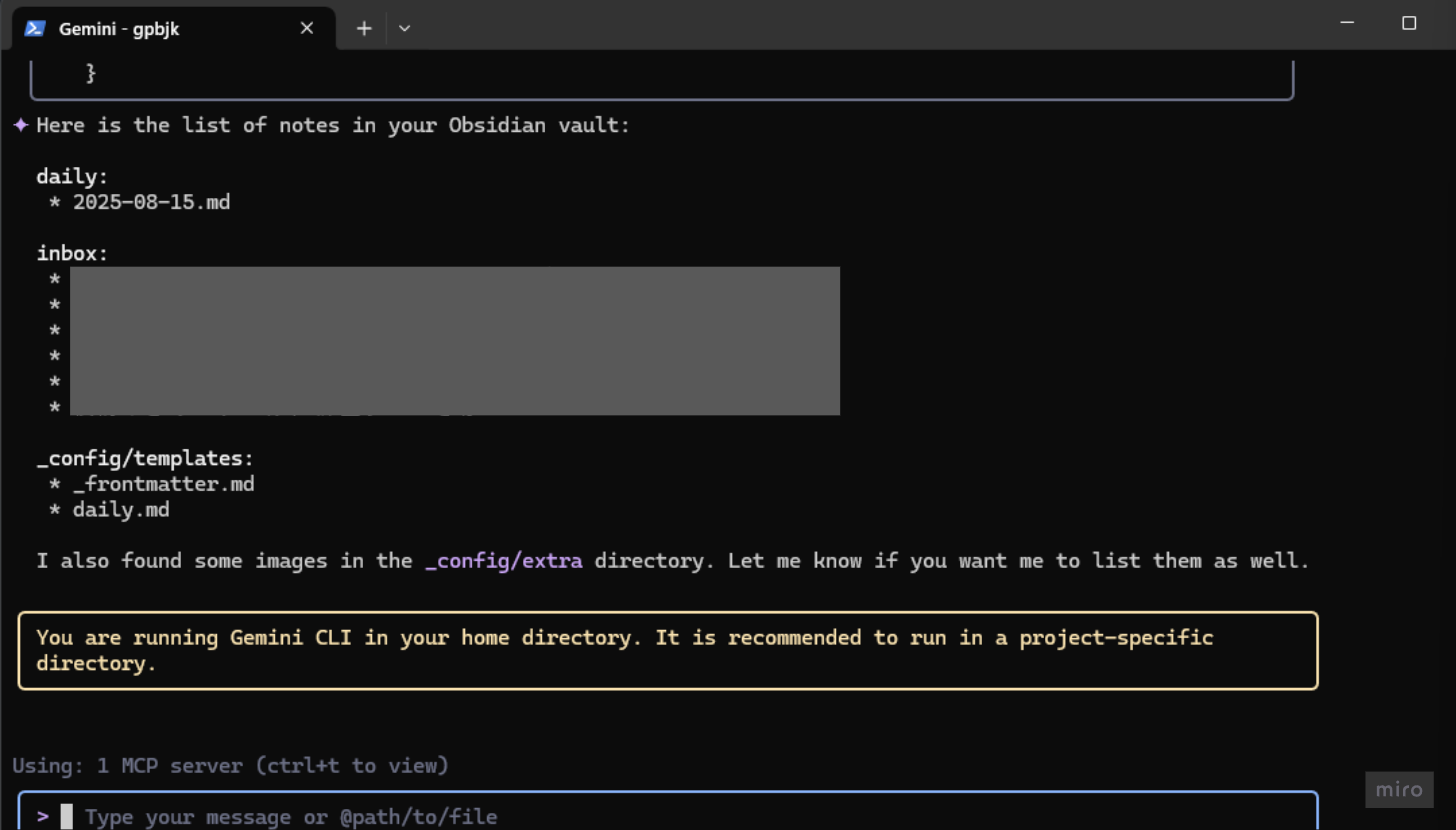
In the chat interface, try:
Get the list of notes in Obsidian
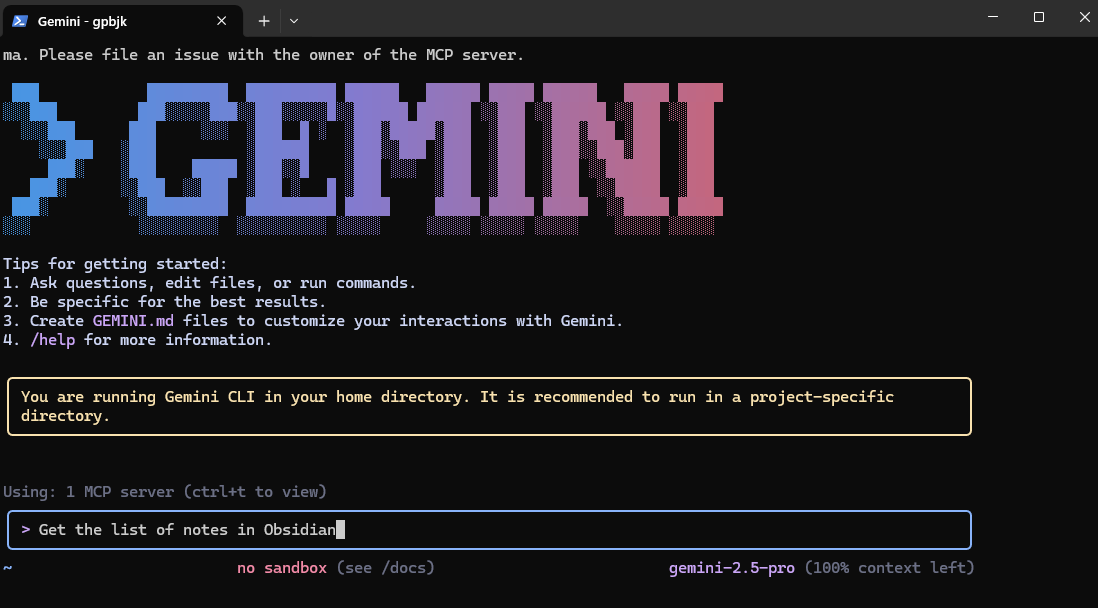
If everything is set up correctly, you should see your Obsidian notes listed.
Other Operation Examples
You can now use natural language commands like:
- "Create a new note"
- "Search for notes with specific keywords"
- "Read the content of a note"
WSL to Windows Obsidian Connection
For WSL users, here's how to access Windows Obsidian from Linux environment.
Kiro Configuration
- Open Kiro
- Add the following to your MCP server configuration:
{
  "mcpServers": {
    "mcp-obsidian": {
      "command": "npx",
      "args": [
        "-y",
        "@smithery/cli@latest",
        "run",
        "mcp-obsidian",
        "--config",
        "{\"vaultPath\":\"/mnt/c/Users/username/OneDrive/tools/obsidian\"}"
      ],
      "env": {},
      "disabled": false,
      "autoApprove": [
        "search_notes",
        "read_notes"
      ]
    }
  }
}
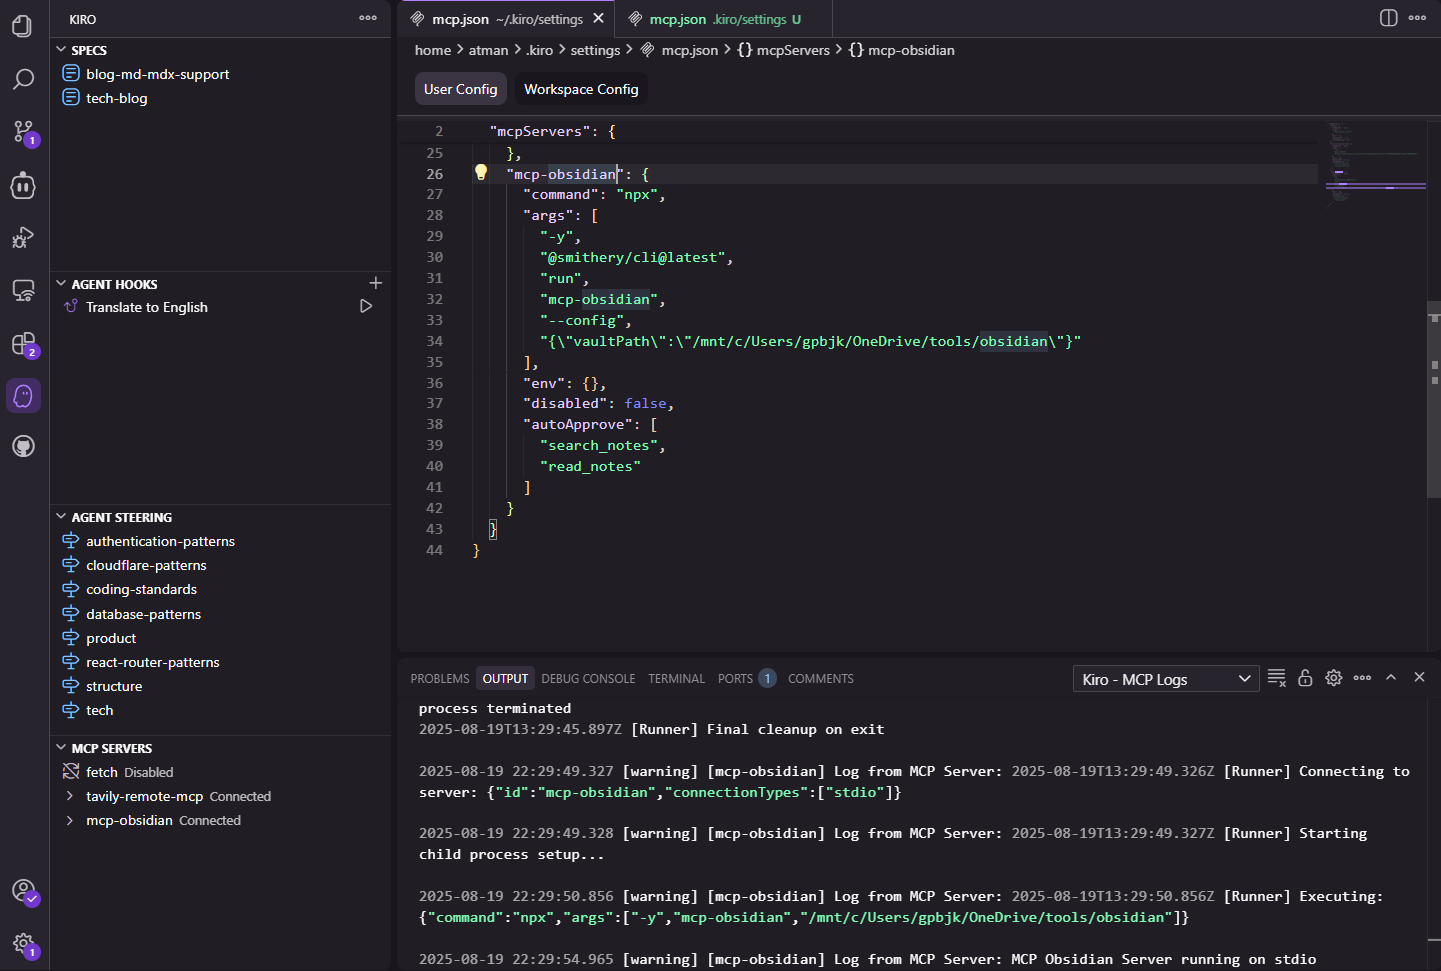
The key is converting Windows paths to WSL mount paths (/mnt/c/...).
Note: The smithery-ai approach is simpler to configure but only supports reading notes, not writing.
Troubleshooting
Common Issues and Solutions
Connection Problems
- Verify API Key is correctly set
- Ensure Obsidian is running
- Wrap paths with spaces in quotes
WSL Connection Issues
- Confirm Windows Obsidian is running
- Verify path is correctly mounted (
/mnt/c/...)
Conclusion
Using Obsidian MCP server enables direct control of Obsidian from AI tools. This is particularly valuable for users managing large collections of notes, as natural language search and operations become possible.
The ability to access Windows Obsidian from WSL environments makes this solution versatile across different development setups.
Give it a try and experience more efficient note management. If you encounter any issues, double-check your configuration settings.
Related Articles
Kiro for Codex: Seamless Spec‑Driven Development in VS Code
A VS Code extension that brings Kiro‑style spec‑driven workflows to Codex CLI—manage Specs, Steering Docs, and Prompts visually and run tasks inline.
How to Restore 'Open with Code' in VSCode Right-Click Menu
Learn how to restore the missing 'Open with Code' option in Windows right-click context menu with two effective methods: VSCode reinstallation and manual registry file configuration.
How to Set Up Serena MCP with Qoder on Windows
This guide explains how to resolve connection issues between Qoder and Serena MCP in a native Windows environment by using the HTTP server mode.