Have you ever wanted to develop an MCP (Model Context Protocol) server with TypeScript, but wondered where to start with the environment setup?
This article provides a step-by-step guide to a "minimal TypeScript setup" for launching a new project and proceeding smoothly with development. We will use Biome for the Linter/Formatter, Husky as a mechanism to maintain code quality, and explain the flow up to publishing as an npm package in the end.
The repository I actually developed is available at https://github.com/atman-33/mcp-ts-minimal, so please refer to this for details.
Project Preparation
First, let's prepare the project container that will be the foundation for development.
1. Create a project folder and initialize Git
First, create a folder for the project and start version control with git init.
mkdir mcp-ts-minimal
cd mcp-ts-minimal
git init
Next, create a .gitignore file to exclude the node_modules and the build artifact dist folder from Git's management.
node_modules
dist
2. Initialize npm project
Execute npm init to create a package.json file. You will be asked a few questions, but you can modify them later, so it's okay to leave them as default for now.
npm init
3. Introduce and configure TypeScript
Install TypeScript as a development dependency and generate tsconfig.json.
npm i -D typescript
npx tsc --init
Edit the generated tsconfig.json as follows. The point is to explicitly specify outDir (output destination after compilation) and rootDir (location of source code).
tsconfig.json
{
  "compilerOptions": {
    "target": "ES2022",
    "strict": true,
    "declaration": true,
    "declarationMap": true,
    "sourceMap": true,
    "esModuleInterop": true,
    "skipLibCheck": true,
    "forceConsistentCasingInFileNames": true,
    "resolveJsonModule": true,
    "outDir": "./dist",
    "rootDir": "src",
    "moduleResolution": "NodeNext",
    "module": "NodeNext"
  },
  "exclude": [
    "node_modules"
  ],
  "include": [
    "./src/**/*.ts"
  ]
}
Keep your code clean with Biome
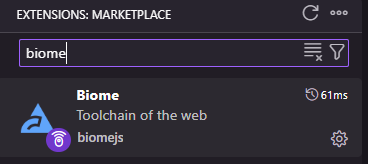
Biome is a very useful tool that performs code formatting and static analysis at high speed.
1. Install and configure Biome
Install Biome and generate a configuration file.
npm install --save-dev --save-exact @biomejs/biome
npx @biomejs/biome init
Once biome.json is generated, let's configure it as follows. We are enabling the formatter and linter for TypeScript files.
biome.json
{
	"$schema": "https://biomejs.dev/schemas/2.x.x/schema.json",
	"vcs": {
		"enabled": false,
		"clientKind": "git",
		"useIgnoreFile": false
	},
	"files": {
		"includes": [
			"src/**/*.ts"
		],
		"ignoreUnknown": false
	},
	"formatter": {
		"enabled": true,
		"indentStyle": "space"
	},
	"linter": {
		"enabled": true,
		"rules": {
			"recommended": true
		}
	},
	"javascript": {
		"formatter": {
			"quoteStyle": "single",
			"semicolons":"always"
		}
	},
	"assist": {
		"enabled": true,
		"actions": {
			"source": {
				"organizeImports": "on"
			}
		}
	}
}
2. Integration with VS Code
If you are using VS Code, you can install the Biome extension and add the following settings to your configuration file (.vscode/settings.json) to automatically format and organize imports on save.
Install the extension:
.vscode/settings.json
{
  "editor.formatOnSave": true,
  "[javascript]": {
    "editor.defaultFormatter": "biomejs.biome"
  },
  "[javascriptreact]": {
    "editor.defaultFormatter": "biomejs.biome"
  },
  "[typescript]": {
    "editor.defaultFormatter": "biomejs.biome"
  },
  "[typescriptreact]": {
    "editor.defaultFormatter": "biomejs.biome"
  },
  "editor.codeActionsOnSave": {
    "quickfix.biome": "explicit",
    "source.fixAll.ts": "explicit",
    "source.sortImports": "never",
    "source.organizeImports": "never",
    "source.organizeImports.biome": "explicit"
  }
}
Automate pre-commit checks with Husky
Husky is a tool that makes it easy to use Git hooks. Let's use this to enforce Biome checks before committing and maintain code quality.
1. Install and configure Husky
Install Husky and perform initial setup.
npm i -D husky
npx husky init
This will create a .husky folder. Next, describe the process you want to execute before committing in the .husky/pre-commit file.
.husky/pre-commit
npx biome check --staged --fix --no-errors-on-unmatched
git update-index --again
Now, every time you run git commit, Biome's check and auto-correction will be executed on the staged files.
Implement the MCP server
Finally, let's implement the main body of the MCP server.
1. Install necessary packages
Install the MCP SDK and Zod, which is used for input value validation.
npm i @modelcontextprotocol/sdk zod zod-to-json-schema
For development, let's also install ts-node and @types/node.
npm i -D ts-node @types/node
2. Minimal MCP server code
Create src/index.ts and implement a minimal MCP server like the one below. This server provides two simple tools: hello and echo.
src/index.ts
#!/usr/bin/env node

import { Server } from '@modelcontextprotocol/sdk/server/index.js';
import { StdioServerTransport } from '@modelcontextprotocol/sdk/server/stdio.js';
import {
  CallToolRequestSchema,
  ListToolsRequestSchema,
} from '@modelcontextprotocol/sdk/types.js';
import { z } from 'zod';
import zodToJsonSchema from 'zod-to-json-schema';

// Input schema for the `echo` tool
const EchoToolInputSchema = z.object({
  message: z.string(),
});

// Create an instance of the MCP server
const server = new Server(
  {
    name: 'mcp-minimal',
    version: '1.0.0',
  },
  {
    capabilities: {
      tools: {},
    },
  },
);

// Handler for `CallTool` requests
server.setRequestHandler(CallToolRequestSchema, async (request) => {
  const { name, arguments: args } = request.params;

  switch (name) {
    case 'hello':
      return {
        content: [{ type: 'text', text: 'Hello from MCP server' }],
      };

    case 'echo': {
      const parsed = EchoToolInputSchema.safeParse(args);
      if (!parsed.success) {
        return {
          content: [
            { type: 'text', text: `Invalid arguments: ${parsed.error}` },
          ],
          isError: true,
        };
      }

      return {
        content: [{ type: 'text', text: `Echo: ${parsed.data.message}` }],
      };
    }

    default:
      return {
        content: [{ type: 'text', text: `Unknown tool: ${name}` }],
        isError: true,
      };
  }
});

// Handler for `ListTools` requests
server.setRequestHandler(ListToolsRequestSchema, async () => {
  return {
    tools: [
      {
        name: 'hello',
        description: 'Responds with a greeting message',
        inputSchema: { type: 'object', properties: {} },
      },
      {
        name: 'echo',
        description: 'Echoes the provided message',
        inputSchema: zodToJsonSchema(EchoToolInputSchema),
      },
    ],
  };
});

// Start the server
async function runServer() {
  const transport = new StdioServerTransport();
  await server.connect(transport);
  console.error('MCP Minimal Server running on stdio');
}

runServer().catch((error) => {
  console.error('Fatal error running server:', error);
  process.exit(1);
});
3. Set up scripts in package.json
Let's enrich the scripts in package.json to make development, building, and quality checks easy.
package.json
{
  "name": "mcp-ts-minimal",
  "scripts": {
    "build": "tsc",
    "dev": "ts-node src/index.ts",
    "start": "node dist/index.js",
    "lint": "biome lint src/",
    "lint:fix": "biome lint --write src/",
    "format": "biome format --write src/",
    "check": "biome check --write src/",
    "typecheck": "tsc --noEmit",
    "quality": "npm run typecheck && npm run check",
    "prepare": "husky"
  }
}
Operation Check
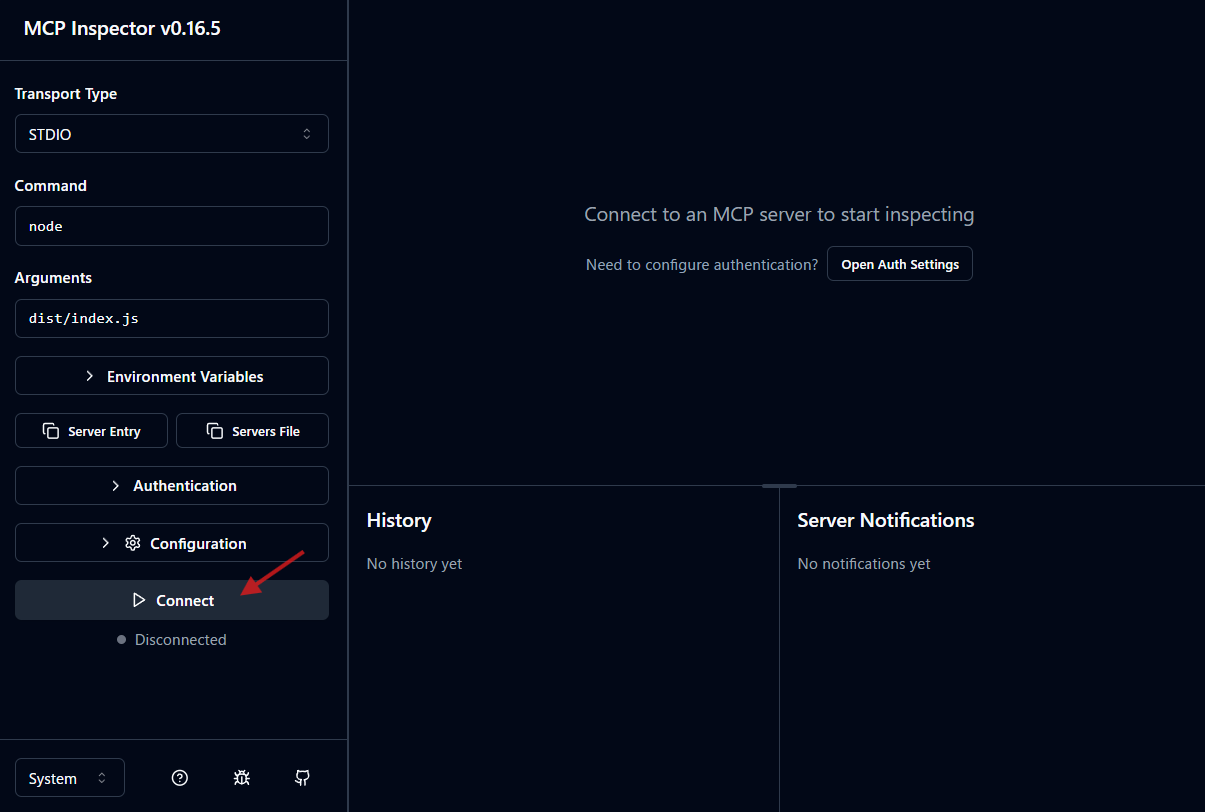
Let's use MCP Inspector to check if the created server works correctly.
First, compile the source code with npm run build. Then, start MCP Inspector with the following command.
npx @modelcontextprotocol/inspector node dist/index.js
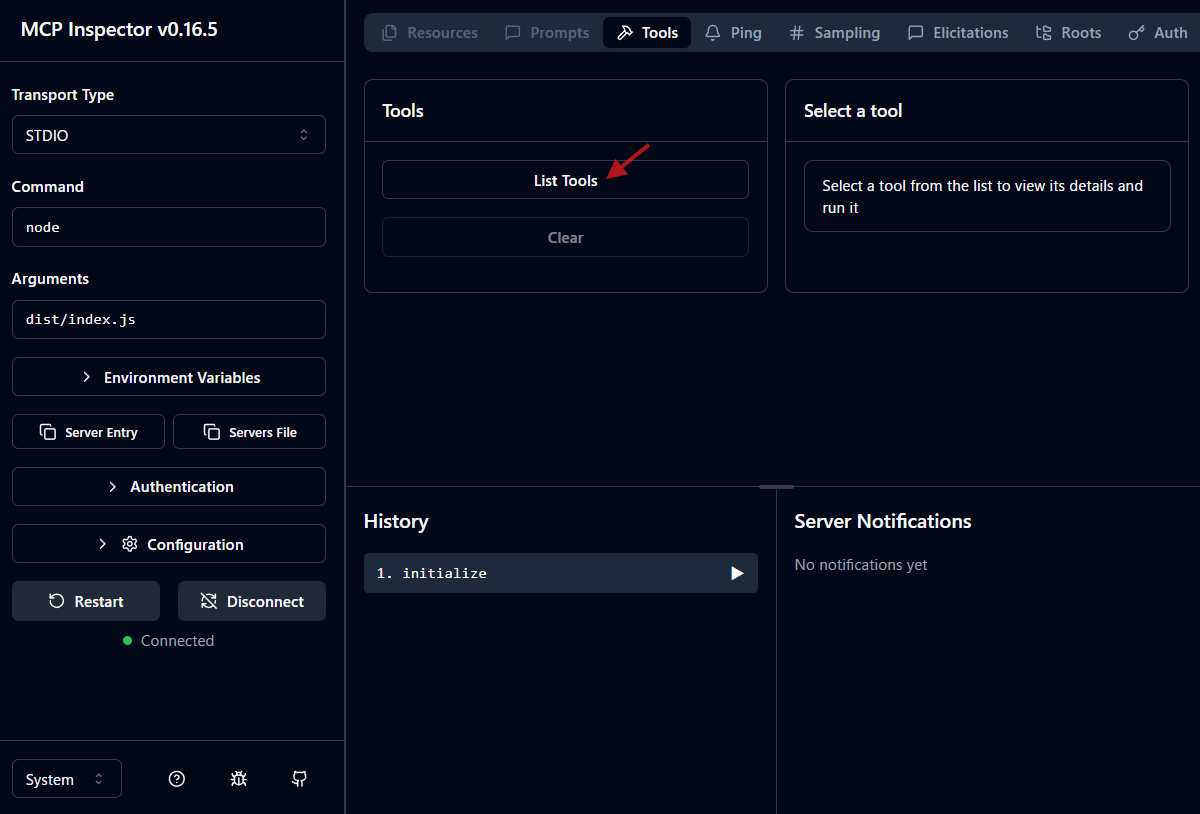
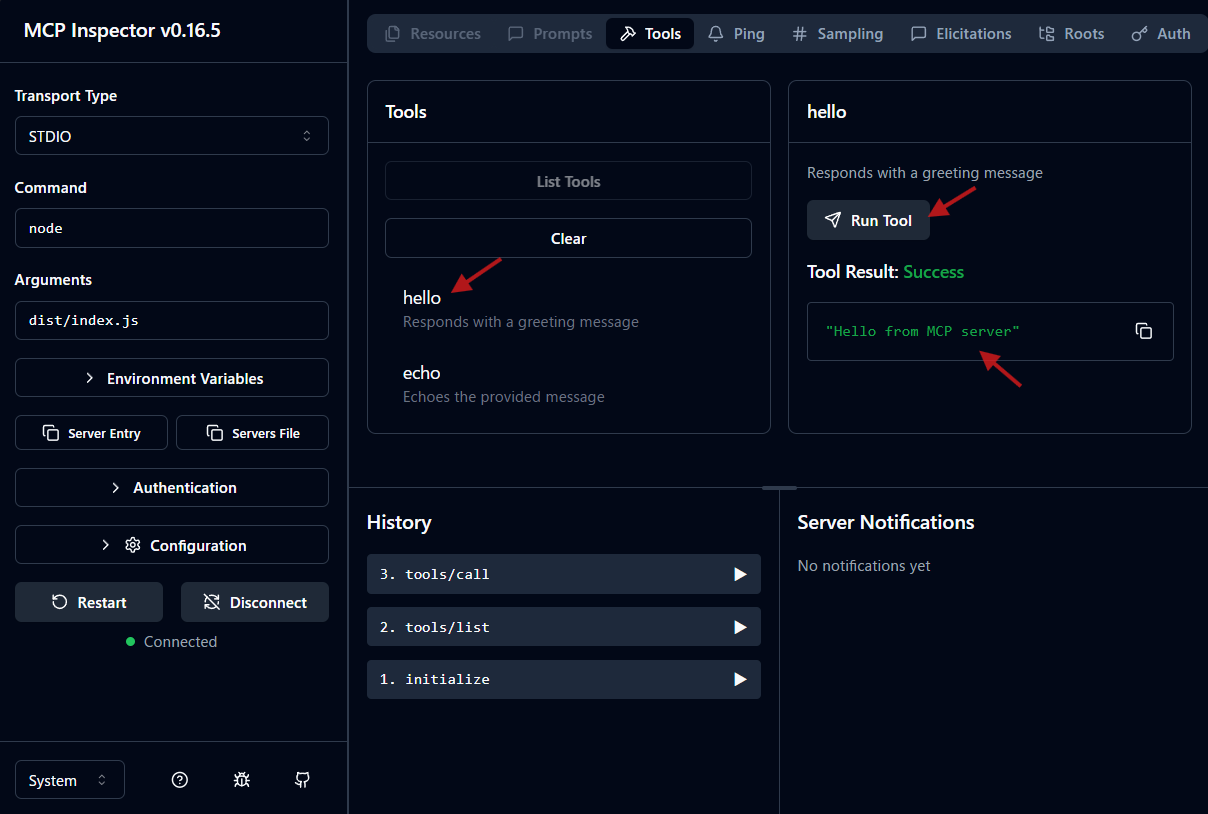
Once MCP Inspector starts, connect to the server with the "Connect" button, and check if the tools are listed with "List Tools" and if each tool works as intended.
Server connection:
List tools:
Check operation:
Publish as an npm package
Finally, let's publish the created MCP server as an npm package so that anyone can use it with the npx command.
1. Publication settings
Create a .npmrc file in the root directory and write access=public to make the package public.
.npmrc
access=public
2. Final adjustments to package.json
Add a bin field so that it can be executed with the npx command, and set the description and files (files to be published).
package.json
{
  "name": "mcp-ts-minimal",
  "version": "0.1.0",
  "description": "A minimal MCP server example with hello and echo tools",
  "bin": {
    "mcp-ts-minimal": "dist/index.js"
  },
  "files": [
    "dist",
    "README.md",
    "package.json"
  ]
}
3. Publish to npm
Once you are ready, build and run npm publish. You need to create an npm account and log in in advance.
npm run build
npm publish
Now, your MCP server has been released to the world!
Summary
This article explained the first step of MCP server development using TypeScript, from project setup to development environment maintenance using Biome and Husky, and the flow up to publication on npm.
Based on this minimal environment, please try to develop your own MCP server with your own tools and functions.
Related Articles
How to Create Sortable & Droppable Components with dnd-kit
Learn how to implement both useSortable and useDroppable in dnd-kit. A practical guide to achieving container reordering and item dropping simultaneously through conditional logic.
Connecting AI Tools to Obsidian with MCP Server - Gemini CLI & Kiro Guide
Learn how to set up Obsidian MCP server to control your notes from Gemini CLI and Kiro. Complete guide including Windows and WSL environment setup.
Verifying GitHub Copilot Code Review Features: Applying Custom Rules and Controlling Output
This article explains the results of verifying whether GitHub Copilot can recognize and point out project-specific rules, and how to control output using prompt engineering.